14. Interface and Applications
Reflection
Group Assignment
Attached is the link to group assignment
2024 Instructor's Feedback:
this(2022 Group Assignment) is actually incomplete; do complete it, e.g. by giving a simple example each of programs developed using AppInventor & tkinter with brief descriptions
I apologise that the Group project that i did in 2022 was not sufficient so in this section will be my attempt to document it nicely again here and add abit more.
In 2022, I did a Tkinter and AppInventor. I still remember that time, I was still relatively new. So wanted to drag everything I can into the app. For both UI, I tried to make the similar outlook and functions and when short pressed, it will "hide" the image; when long pressed, it will show the image again.
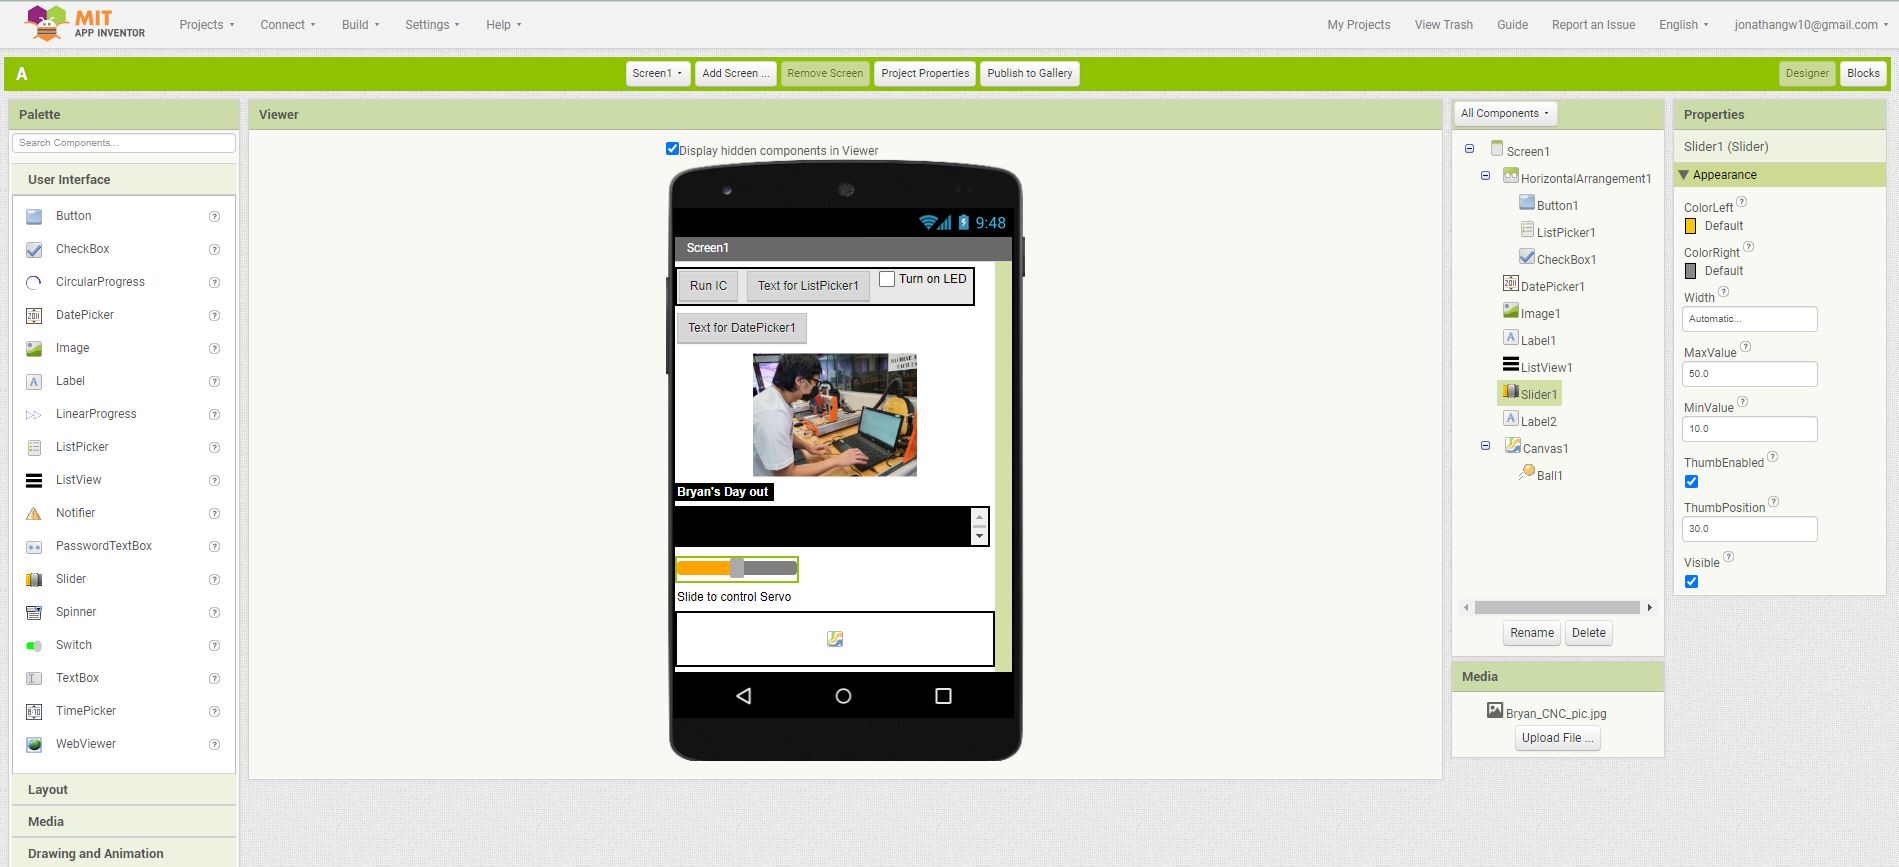
Below is the screenshots of the Process in AppInventor.
1. Design UI by Drag and Drop inside the Designer Interface.
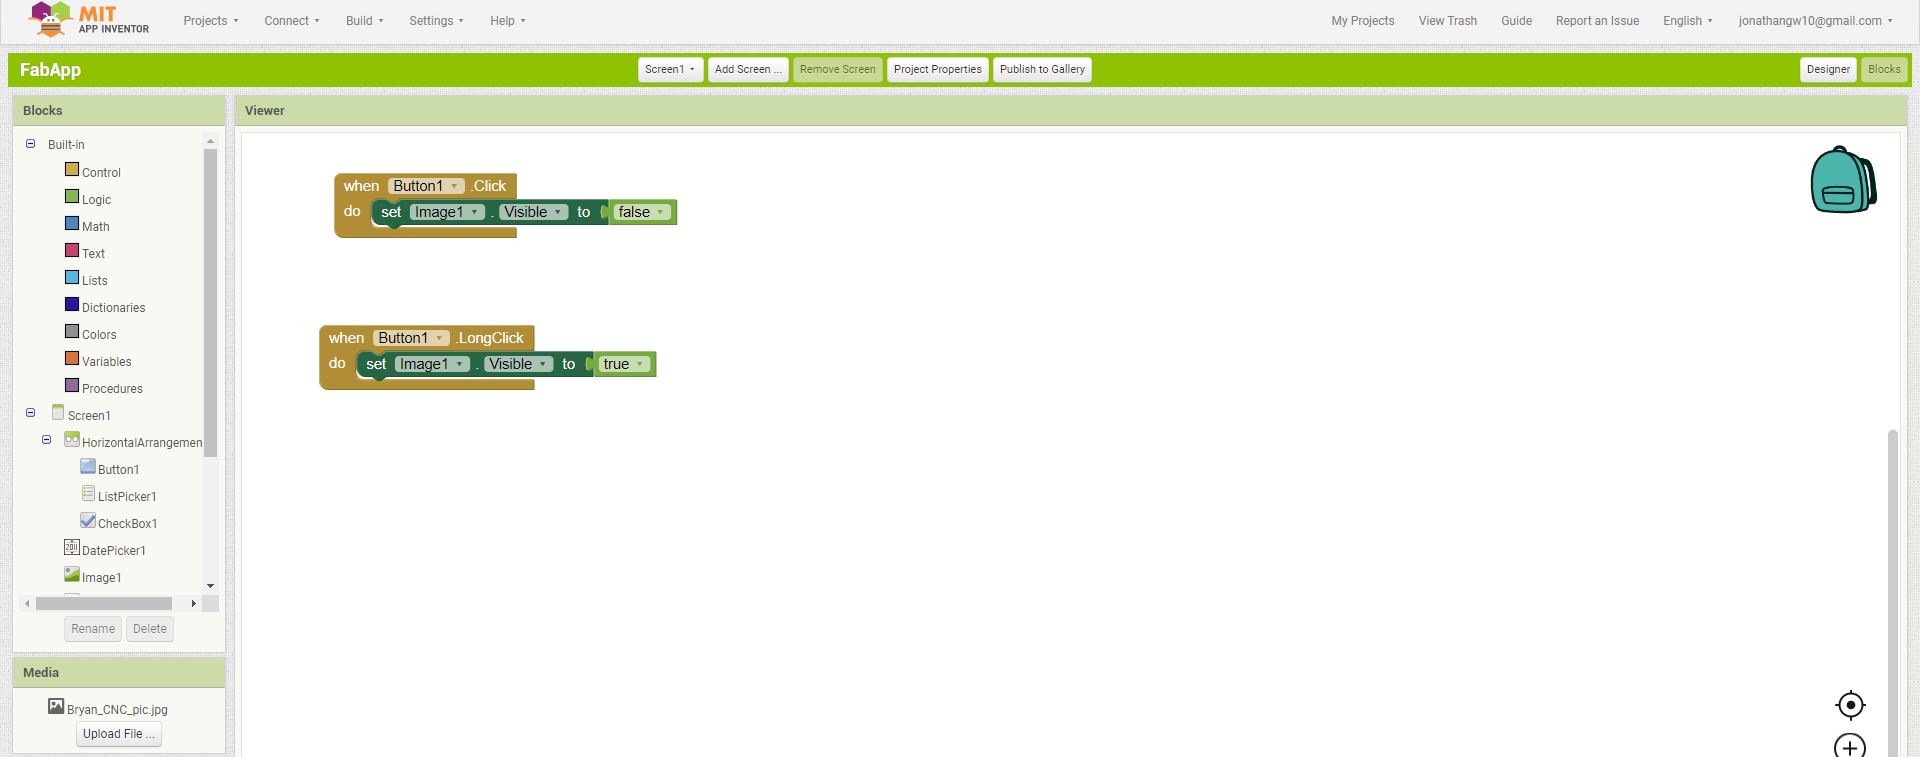
2. Code process and interaction by Drag and Drop in the Block Interface. Noticed, I code the image to hide and show based on long/short press.
3. Run Emulator, the design file (APK is 4MB so it cant be uploaded.) is also saved in this link if you like to use it at your android.

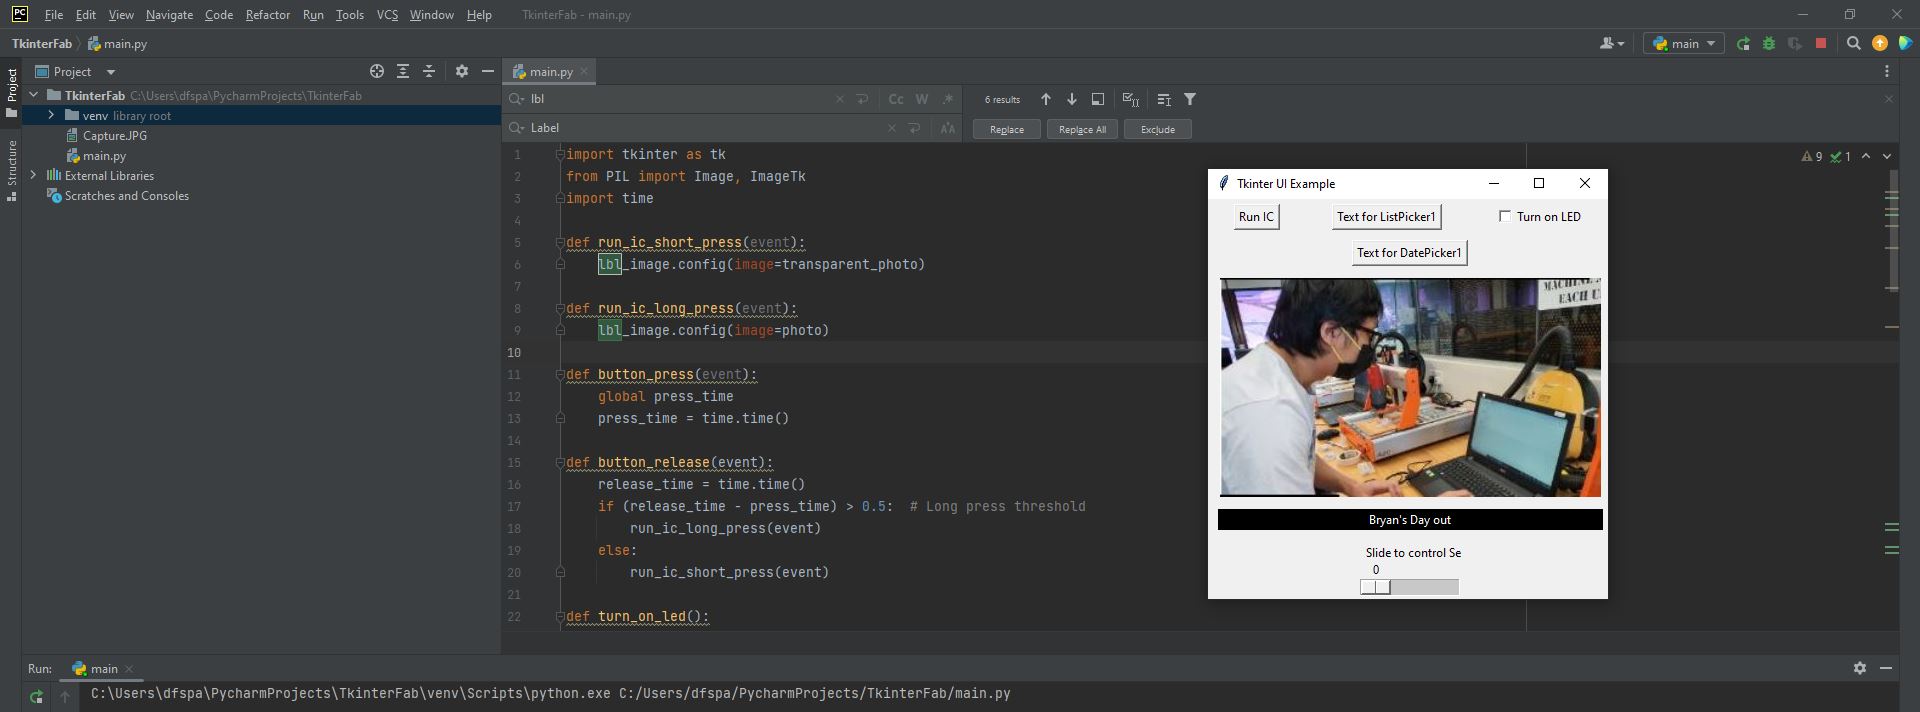
Below is the screenshots of the Process in Tkinter.
1. Design UI and code interaction(long and short press) by Coding in Pycharm. (At 2024 25/6 then i know of the GUI Designer for Tkinter, if used it maybe would have saved significant time).
3. Run Code
Below if basic comparison of Tkinter and AppInventor
| Feature | App Inventor | Tkinter |
|---|---|---|
| Pros |
|
|
| Cons |
|
|
Individual Assignment
- ☑ Linked to the group assignment page
- ☑ Documented your process
- ☑ Explained the GUI that you made and how you did it
- ☑ Explained how your application communicates with your MCU board
- ☑ Explained any problems you encountered and how you fixed them
- ☑ Included orginal source code (or a screenshot of the app code if that's not possible)
- ☑ Included a 'hero shot' of your board
Learning from Serial Communication and UI Design
During this project, I deepened my understanding of user interface development and serial communication. Here are the key concepts and tools I utilized:
| Tool/Concept | Description |
|---|---|
| PyQt Designer | Used for designing the graphical user interface for my application. |
| PyQt Serial Port | Implemented for handling serial communication between the interface and the Arduino, enabling commands to control the hardware directly from the UI. |
Design and Fabrication Process
In this project I did more of the design of the interface where there is only two buttons. One to turn the servo one way and another to move it back. I will be using this to control the motion of my ball release in my final project.
Programming Processes
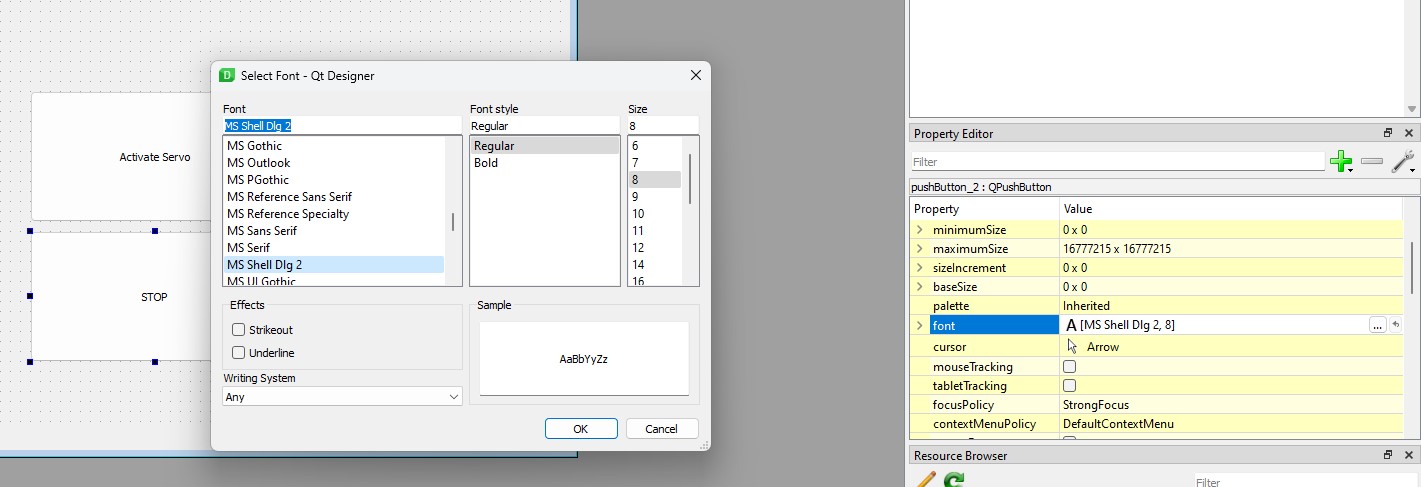
I utilized PyQt Designer for the user interface layout, I dragged the buttons I needed and changed their size accordingly and saved the UI File.

then converted ui file into py file import the Python scripts into Pycharm
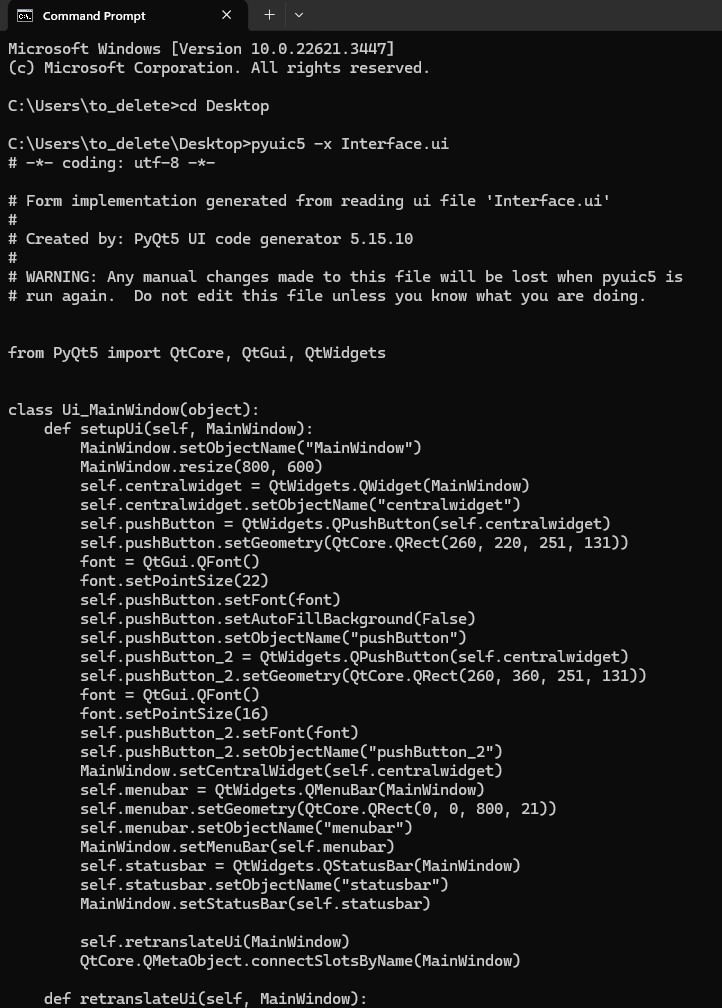
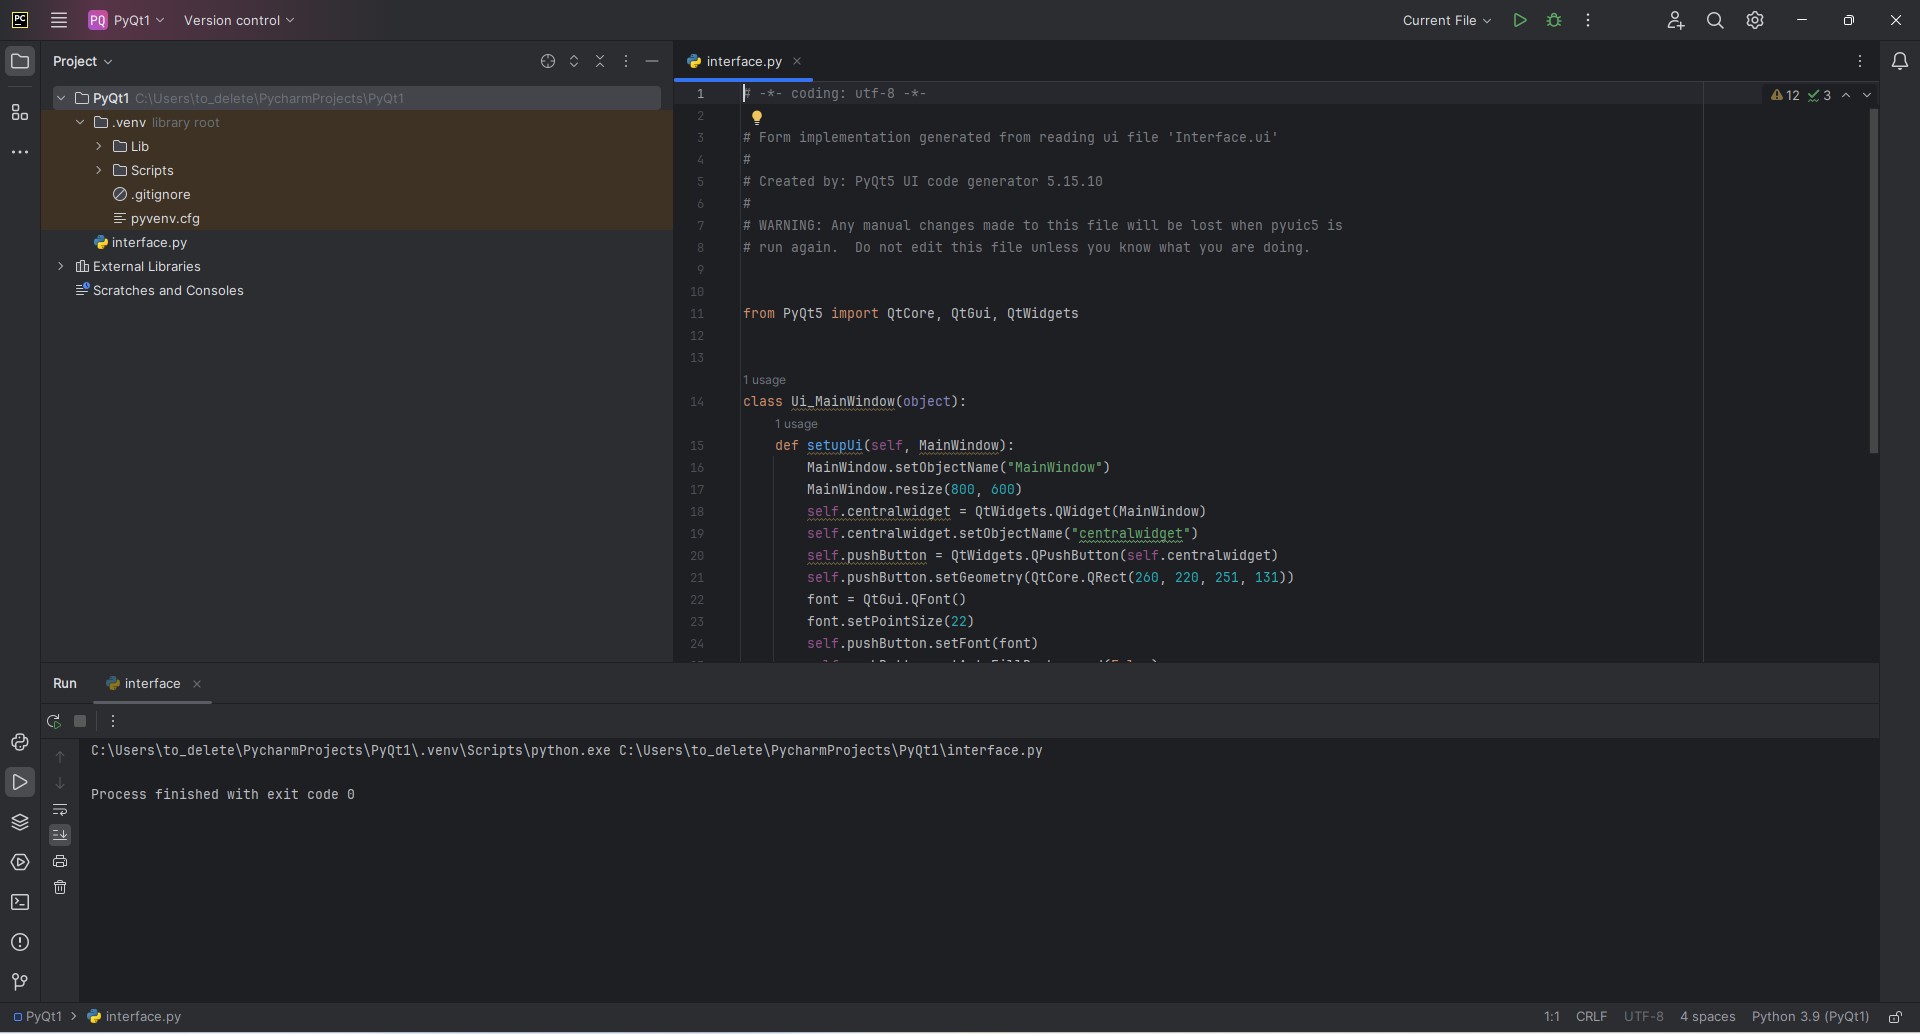
and then added new codes to manage serial communications with the Arduino when buttons pressed.
Source Code and Design Files
For Python UI in Pycharm
    # -*- coding: utf-8 -*-
    from PyQt5 import QtCore, QtGui, QtWidgets
    import serial  # Import the serial library


    class Ui_MainWindow(object):
        def setupUi(self, MainWindow):
            MainWindow.setObjectName("MainWindow")
            MainWindow.resize(800, 600)
            self.centralwidget = QtWidgets.QWidget(MainWindow)
            self.centralwidget.setObjectName("centralwidget")

            self.pushButton = QtWidgets.QPushButton(self.centralwidget)
            self.pushButton.setGeometry(QtCore.QRect(260, 220, 251, 131))
            font = QtGui.QFont()
            font.setPointSize(22)
            self.pushButton.setFont(font)
            self.pushButton.setObjectName("pushButton")

            self.pushButton_2 = QtWidgets.QPushButton(self.centralwidget)
            self.pushButton_2.setGeometry(QtCore.QRect(260, 360, 251, 131))
            font = QtGui.QFont()
            font.setPointSize(16)
            self.pushButton_2.setFont(font)
            self.pushButton_2.setObjectName("pushButton_2")

            MainWindow.setCentralWidget(self.centralwidget)
            self.menubar = QtWidgets.QMenuBar(MainWindow)
            self.menubar.setGeometry(QtCore.QRect(0, 0, 800, 21))
            self.menubar.setObjectName("menubar")
            MainWindow.setMenuBar(self.menubar)
            self.statusbar = QtWidgets.QStatusBar(MainWindow)
            self.statusbar.setObjectName("statusbar")
            MainWindow.setStatusBar(self.statusbar)

            self.retranslateUi(MainWindow)
            QtCore.QMetaObject.connectSlotsByName(MainWindow)

            # Serial port setup
            self.serial_port = serial.Serial(port='COM7', baudrate=9600, timeout=.1)
            self.pushButton.clicked.connect(self.activate_servo)
            self.pushButton_2.clicked.connect(self.stop_servo)

        def retranslateUi(self, MainWindow):
            _translate = QtCore.QCoreApplication.translate
            MainWindow.setWindowTitle(_translate("MainWindow", "MainWindow"))
            self.pushButton.setText(_translate("MainWindow", "Turn AntiClockwise"))
            self.pushButton_2.setText(_translate("MainWindow", "Turn Back"))

        def activate_servo(self):
            self.serial_port.write(b'1')  # Sending '1' to activate the servo

        def stop_servo(self):
            self.serial_port.write(b'0')  # Sending '0' to stop the servo


    if __name__ == "__main__":
        import sys

        app = QtWidgets.QApplication(sys.argv)
        MainWindow = QtWidgets.QMainWindow()
        ui = Ui_MainWindow()
        ui.setupUi(MainWindow)
        MainWindow.show()
        sys.exit(app.exec_())
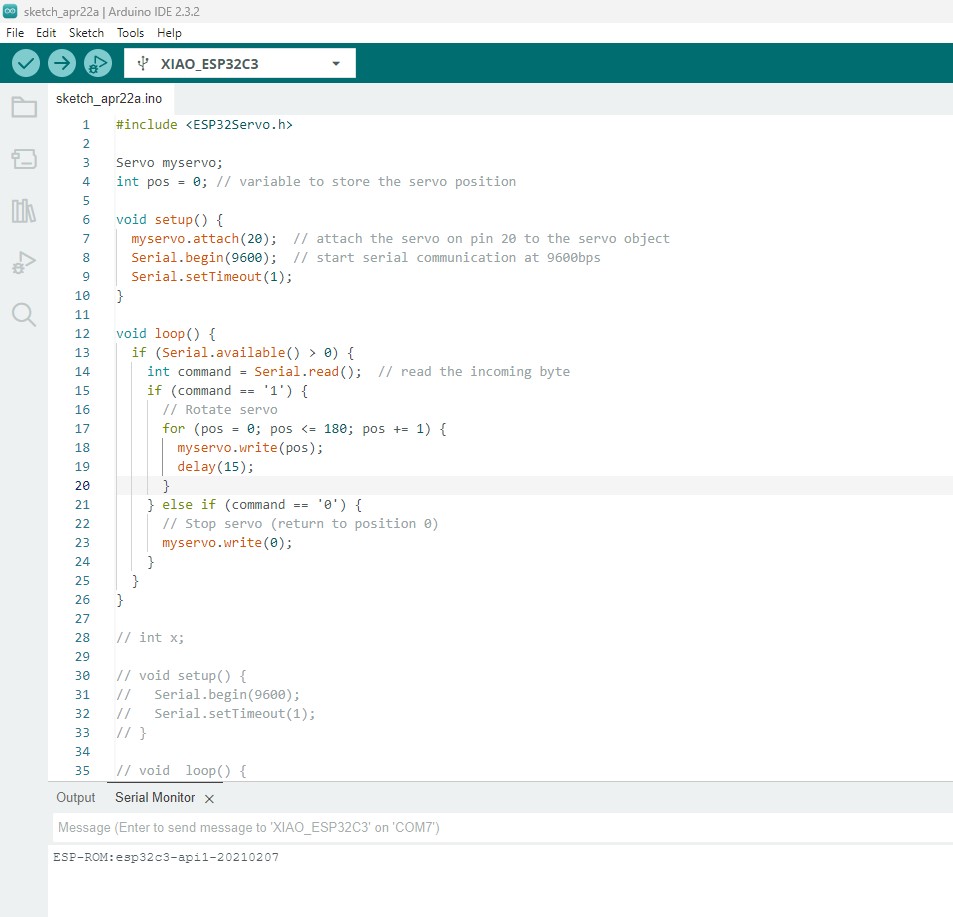
For Esp32
    #include

        Servo myservo;
        int pos = 0; // variable to store the servo position

        void setup() {
          myservo.attach(20);  // attach the servo on pin 9 to the servo object
          Serial.begin(9600);  // start serial communication at 9600bps
        }

        void loop() {
          if (Serial.available() > 0) {
            int command = Serial.read();  // read the incoming byte
            if (command == '1') {
              // Rotate servo
              for (pos = 0; pos <= 180; pos += 1) {
                myservo.write(pos);
                delay(15);
              }
            } else if (command == '0') {
              // Stop servo (return to position 0)
              myservo.write(0);
            }
          }
        }
Troubleshooting and Problem Solving
I encountered several issues during the development, especially with establishing a stable serial connection between my PC and the Arduino. Initially, I faced challenges because the serial port was occupied by the Arduino IDE, which prevented my Python script from accessing it. After closing the Arduino IDE, I was able to establish a connection and successfully control the hardware using my application.
Project Files and Documentation
- ESP32C3 Board DesignedFinal Product Showcase
Here is my hero shot. Where I pressed the button on my Pc and it sends a command to ESP32 to activate the servo.